Sticky Honey Garlic Pork Tenderloin
Welcome to my kitchen, where good food brings people together! I am Cristina Gabriela Dumitrescu, and like so many busy home cooks across the country, I frequently find myself standing in front of an open refrigerator at six o’clock on a Tuesday evening, wondering how to turn basic staples into an extraordinary meal. Weeknight dinners can easily fall into a monotonous routine of dry chicken breasts or expensive takeout containers that leave everyone feeling uninspired. Finding a recipe that balances effortless execution, incredible flavor, and budget-friendly ingredients is often the ultimate goal for any family cook.
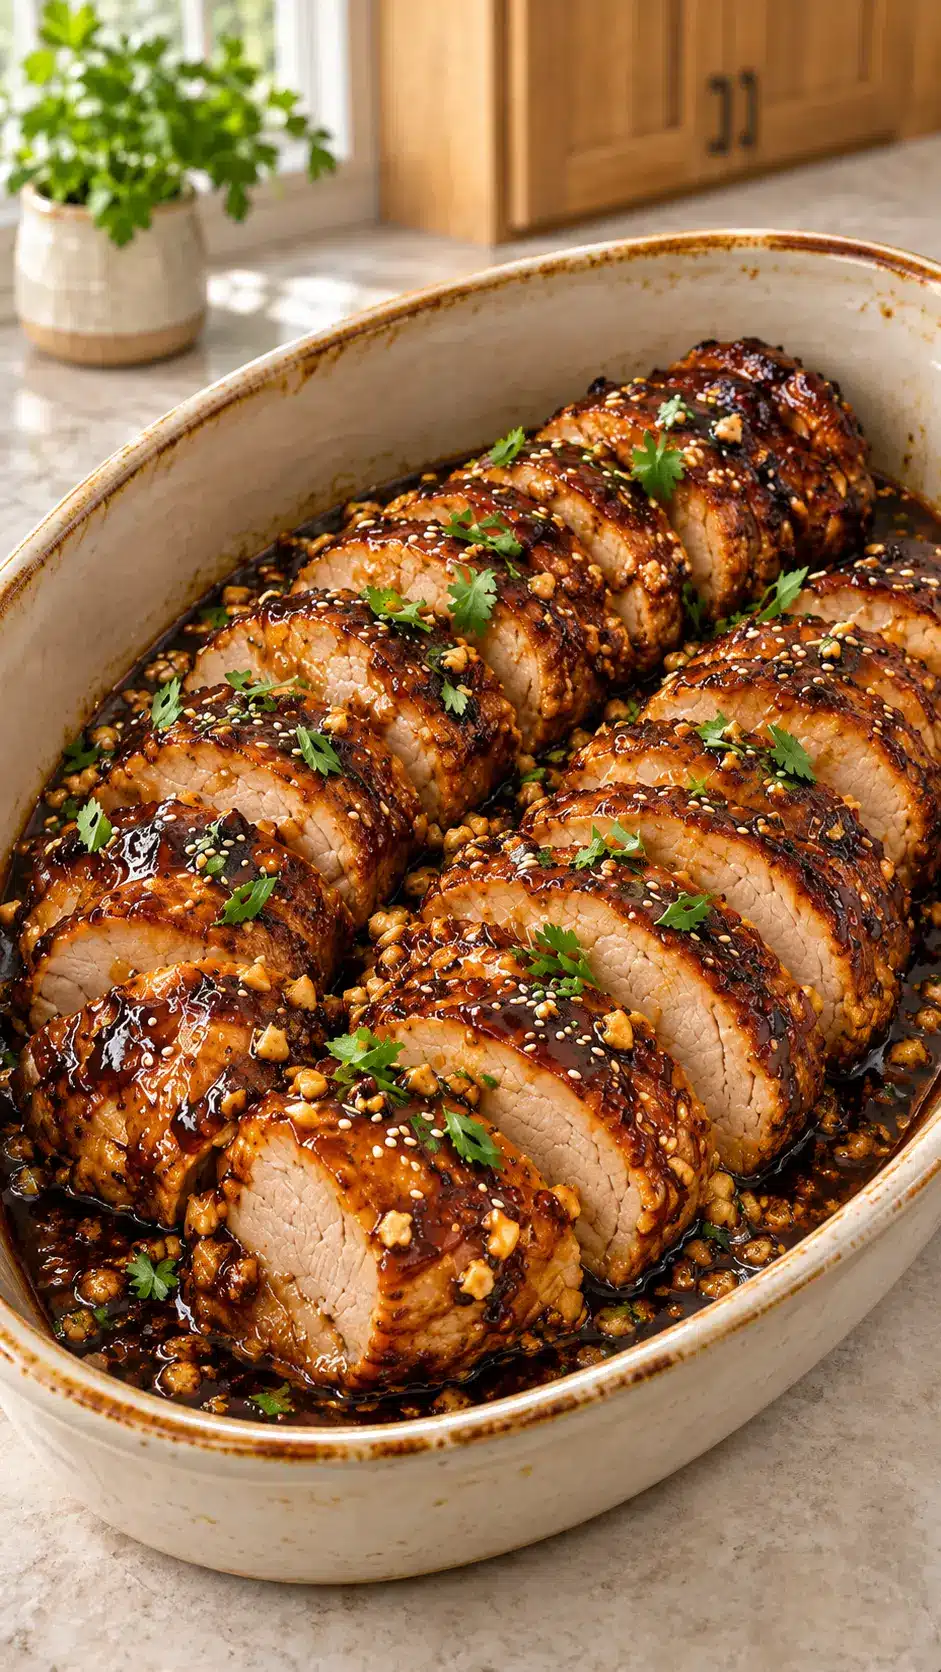
That is exactly why I am thrilled to share my absolute favorite recipe for Easy Honey Garlic Pork Tenderloin, a dish designed to solve every evening meal dilemma with minimal effort and maximum culinary flair. This recipe balances sweet, savory, and aromatic notes into a glossy, sticky glaze that coats tender, juicy slices of golden-brown roasted pork. It provides a comforting solution for hectic workdays while remaining elegant enough to serve to guests during weekend dinner parties without breaking a sweat.
By relying on smart kitchen techniques and fresh ingredients, you can transform simple cuts of meat into a restaurant-worthy masterpiece right in your own home skillet. The marriage of pungent garlic, floral honey, and savory soy sauce creates a quick preparation dinner option that pleases both pick-eats and discerning adult palates alike. Join me as we explore how to create this deliciously satisfying meal that will quickly become a cherished staple in your weekly rotation.
Discover more delicious recipes and everyday cooking tips at MindaPos!
The history and tradition behind Easy Honey Garlic Pork Tenderloin
Pork tenderloin has long held a cherished position in American culinary tradition, prized for its lean structure, soft texture, and ability to absorb bold flavors. Historically, pork was a foundational protein across rural American farms, valued for its heartiness and accessibility through all seasons of the year. As home kitchens modernized during the mid-twentieth century, cooks began experimenting with faster, high-heat methods to showcase this naturally tender cut without drying it out.
The harmonious pairing of sweet honey and aromatic garlic draws deep inspiration from traditional East Asian glaze techniques, which were enthusiastically integrated into American home cooking over the last several decades. Fusion cooking allowed American families to experiment with soy sauce, fresh ginger, and local honey, creating a new wave of flavor profiles. This cross-cultural blending transformed standard meat-and-potatoes roasts into vibrant, glazed dishes that satisfied a growing appetite for dynamic sweet and savory combinations.
Over time, home chefs realized that heavy slow-cooking was unnecessary for small, tender cuts like pork tenderloin. The modern technique of searing the exterior in a hot skillet before roasting it in a hot oven quickly gained popularity across midwestern and southern kitchens. This dual-temperature approach allowed cooks to lock in savory juices while developing a richly caramelized surface crust in a fraction of the time.
Today, preparing an Easy Honey Garlic Pork Tenderloin represents a seamless synthesis of classic American comforting roast traditions and contemporary weeknight speed. It reflects a shift toward lighter, flavorful cooking that honors classic family gatherings around the dinner table. Serving this dish connects modern home cooks to a long lineage of domestic creators who turned simple pantry staples into memorable family feasts.
Why you will love Easy Honey Garlic Pork Tenderloin
- Irresistible Sweet and Savory Harmony: The sticky glaze strikes an impeccable balance between rich honey, umami-packed soy sauce, and aromatic garlic, creating a flavor profile that appeals to every palate.
- Remarkably Tender and Juicy Texture: Searing the meat on the stove before finish-roasting in the oven preserves maximum moisture, ensuring soft, melt-in-your-mouth slices every single time.
- Quick Preparation for Busy Nights: Requiring under forty minutes of total cooking time, this recipe delivers a low-effort meal without compromising on depth of flavor or presentation.
- Budget-Friendly Protein Option: Pork tenderloin offers an affordable alternative to costly cuts of beef while providing a gourmet quality experience right at your dining room table.
- Naturally Wholesome and Nutritious: Being a naturally lean cut of meat, pork tenderloin provides a healthy alternative for families seeking high-protein meals with minimal saturated fat content.
- Versatile Pairing Flexibility: The robust yet adaptable sauce pairs seamlessly with a wide range of sides, from creamy mashed potatoes to crisp roasted vegetables or steamed jasmine rice.
- Simple One-Pan Glaze Process: The pan sauce comes together quickly in the same skillet used for searing, capturing every bit of flavorful fond without creating extra dishes to wash.
- Foolproof Cooking Method: Straightforward temperature targets and clear visual cues make this recipe virtually stress-free, even for beginner home cooks attempting tenderloin for the first time.
The kitchen secrets behind perfect flavor and texture
Achieving the perfect texture in an Easy Honey Garlic Pork Tenderloin relies heavily on basic thermal food science and proper moisture management. Pork tenderloin is an extremely lean muscle with very little intramuscular fat, meaning it can quickly turn dry and tough if overcooked. By initiating the cooking process with a high-heat sear in olive oil, you trigger the Maillard reaction, which browns the surface proteins and creates hundreds of new flavor compounds. This initial crust seals the exterior, while a gentler finish in a 400°F oven allows the internal heat to rise evenly toward the target temperature.
Monitoring internal temperature is the single most critical factor for tender pork. Pulling the tenderloin out of the oven when it reaches exactly 145°F guarantees that the meat remains juicy, tender, and subtly rosy in the center. During the mandatory resting phase of three to five minutes, carryover cooking allows the internal heat to stabilize while muscle fibers relax. Resting prevents the valuable juices from gushing out onto the cutting board, ensuring that every bite stays exceptionally moist.
The science behind the glaze involves balancing natural sugars, acids, and starches to achieve a glossy coating that clings to the meat. Honey and brown sugar provide sticky caramelization, while apple cider vinegar introduces sharp acidity to cut through the sweetness. Low-sodium soy sauce delivers essential sodium and glutamate compounds that enhance the natural savory qualities of the pork. Finally, introducing a cornstarch slurry provides controlled gelatinization, thickening the pan juices into a luxurious sauce without scorching the delicate sugars.
Aromatics like freshly minced garlic and grated ginger play a vital chemical role in the overall aroma and taste experience. Cooking garlic briefly releases its pungent sulfur compounds, which mellow into sweet, nut-like notes when simmered alongside liquid honey. Fresh ginger contains natural enzymes that slightly soften meat fibers while adding a refreshing, spicy top note that prevents the rich glaze from feeling heavy on the palate. Combined, these precise scientific interactions yield a balanced, multi-dimensional sauce that clings effortlessly to every cut slice.
How to choose the best ingredients for gourmet results
Starting with high-quality components is the key to elevating a simple weeknight roast into a true gourmet quality experience. When visiting your local supermarket or grocery store such as Kroger, Walmart, or a neighborhood butcher shop, look for pork tenderloins that display a deep reddish-pink color. Avoid meat that looks pale, gray, or has excess liquid pooling in the plastic packaging, as these are indicators of age and moisture loss. Choosing clean, well-trimmed pork tenderloin ensures uniform cooking and superior flavor retention throughout the roasting process.
Selecting local produce for your garlic and ginger makes a noticeable difference in the final aroma of your dish. Fresh garlic heads should feel firm, plump, and heavy for their size, with dry, tight paper skins that show no green sprouts. Fresh ginger root ought to have smooth, taut skin that snaps crisply when broken, offering a bright, spicy scent that far surpasses pre-ground dried spices. Shopping at seasonal farmers markets allows you to procure sustainably sourced ingredients that support regional growers while delivering peak natural freshness.
The choice of liquid ingredients directly impacts the texture and balance of your sticky honey glaze. Opt for raw, unfiltered honey if possible, as it retains natural floral notes and a rich thickness that caramelizes beautifully over heat. Low-sodium soy sauce is strongly recommended over regular soy sauce, giving you precise control over the saltiness of the final pan glaze. For cooking oil, a high-quality extra virgin olive oil or neutral high-heat oil ensures smooth pan searing without smoking or scorching your skillet.
Incorporating fresh ingredients for garnishing provides the crucial final layer of texture and color contrast. Bright green cilantro or crisp flat-leaf parsley adds a clean, herbaceous note that balances the deep caramel notes of the honey garlic reduction. Nutty toasted sesame seeds lend a delicate crunch and visual appeal that elevates the presentation instantly. Investing a few extra moments to select vibrant, high-grade produce guarantees that your homemade meal looks and tastes like a dish served at a fine dining establishment.
Ingredient variations and dietary adaptations
Adapting this versatile recipe for plant-based or traditional fasting diets requires a few simple modifications while maintaining the signature sweet and savory balance. For a plant-based alternative, replace the pork tenderloin with extra-firm tofu blocks, thick cauliflower steaks, or king oyster mushroom clusters. Press the tofu thoroughly to remove excess moisture before pan-searing it to achieve a golden, crispy crust. Substitute the honey with pure maple syrup or agave nectar to keep the sticky glaze entirely free from animal products while securing that gorgeous caramel shine.
Creating a certified gluten-free version of this dish is remarkably easy and requires no compromise on taste or texture. Traditional soy sauce contains fermented wheat, so simply substitute it with an equal amount of tamari, coconut aminos, or certified gluten-free soy sauce. Verify that your cornstarch package is certified gluten-free to prevent any risk of cross-contamination during thickening. The resulting sauce remains dark, glossy, and intensely savory, making it completely safe for guests with celiac disease or gluten sensitivities.
If you are following a low-carb or ketogenic lifestyle, you can easily alter the sugar components to fit your macros without losing flavor. Replace the raw honey with a sugar-free keto honey substitute made from soluble fiber, and swap the brown sugar for a monk fruit or erythritol brown sugar blend. Instead of using cornstarch to thicken the sauce, simply reduce the liquid over medium-low heat for a few extra minutes or whisk in a tiny pinch of xanthan gum. These smart adjustments yield a low calorie, low-carb feast that aligns perfectly with strict keto parameters.
For home cooks managing sodium intake or dairy allergies, this recipe is naturally accommodating since it contains no butter or cream. To further lower the sodium content, choose an extra low-sodium soy sauce or coconut aminos, which naturally contain significantly less salt per tablespoon. You can also increase the amount of fresh ginger and apple cider vinegar slightly, as their natural brightness compensates for lower salt levels by stimulating your taste buds effectively.
When key pantry ingredients are missing, thoughtful kitchen swaps will keep your dinner plans right on track. If fresh garlic is unavailable, substitute three-quarters of a teaspoon of high-quality garlic powder directly into the whisked glaze. Dry ground ginger can replace fresh grated ginger at a ratio of one-quarter teaspoon ground to one teaspoon fresh. If apple cider vinegar is out of reach, rice wine vinegar or fresh lemon juice provides the necessary bright acidity to keep your sweet garlic sauce wonderfully balanced.
The best sides and drinks to serve with this dish
- Creamy Garlic Mashed Potatoes: Yukon Gold potatoes whipped with roasted garlic and warm cream provide a rich, velvety bed that catches every last drop of sticky honey glaze.
- Roasted Garlic Green Beans: Fresh green beans tossed in olive oil and roasted until blistered offer a crisp-tender texture and vibrant green color contrast on your family dinner plate.
- Steamed Jasmine or Basmati Rice: Fluffy, aromatic long-grain rice serves as an ideal neutral base, absorbing the savory pan sauce and creating a quick, satisfying meal structure.
- Crisp Asian Cucumber Salad: Thinly sliced cucumbers tossed with rice vinegar, sesame oil, and red pepper flakes deliver a refreshing, crunchy bite that cuts through the rich pork.
- Buttery Roasted Carrots and Parsnips: Earthy root vegetables caramelized in the oven complement the natural sweetness of the honey sauce, enhancing the comforting nature of the roast.
- Chardonnay or Pinot Noir Pairings: A lightly oaked Chardonnay offers crisp acidity that contrasts the glaze, while a smooth Pinot Noir highlights the natural, delicate savory notes of the tenderloin.
- Iced Jasmine Green Tea: Unsweetened chilled green tea infused with lemon offers a clean, antioxidant-rich beverage pairing that refreshes the palate between savory bites.
Refrigerating, freezing, and reheating correctly
- Refrigeration Storage Guidelines: Allow leftover pork tenderloin to cool completely to room temperature before slicing or transferring. Store the meat alongside its remaining honey garlic glaze in an airtight glass or plastic container in the refrigerator for up to four days to preserve optimal moisture and freshness.
- Freezer Preparation Steps: For long-term storage, slice the cooked tenderloin into thick rounds and submerge them in the reduced glaze within a heavy-duty freezer bag or vacuum-sealed pouch. Freeze for up to three months, ensuring you remove as much air as possible to protect the succulent meat from freezer burn.
- Safe Thawing Methods: Thaw frozen pork tenderloin overnight in the lower shelf of your refrigerator to maintain a safe temperature zone. Avoid defrosting meat on the kitchen counter at room temperature, as rapid temperature shifts can compromise food safety and degrade muscle texture.
- Gentle Reheating Techniques: To keep the pork from drying out, place sliced tenderloin in a baking dish, spoon extra glaze or a tablespoon of water over the top, cover tightly with aluminum foil, and warm in an oven at 325°F for 12 to 15 minutes. Alternatively, reheat individual portions in a skillet over low heat with a splash of broth, stirring gently until warm.
Nutrition information and preparation times
- Calories: approximately 285 kcal per serving
- Protein: approximately 34 grams per serving
- Fat: approximately 7 grams per serving
- Carbohydrates: approximately 20 grams per serving
| Parameter | Value |
|---|---|
| Prep time | 15 min |
| Cook time | 25 min |
| Total time | 40 min |
| Difficulty | Easy |
| Servings | 6 servings |
Ingredients
For the pork tenderloin
- 2 pork tenderloins (about 2 lbs total), trimmed of excess silver skin
- 1 tbsp olive oil
- ½ tsp black pepper
For the honey garlic glaze and garnish
- ⅓ cup honey
- ¼ cup low-sodium soy sauce
- 4 garlic cloves, minced
- 2 tbsp brown sugar
- 1 tbsp apple cider vinegar
- 1 tsp fresh ginger, finely grated
- 1 tbsp cornstarch mixed with 2 tbsp water
- 1 tbsp sesame seeds, toasted
- 2 tbsp fresh cilantro or parsley, finely chopped
A step-by-step guide to a successful recipe
Step 1: Preheating the oven and setting up the station
Begin your cooking journey by setting your oven to 400°F and ensuring your oven rack is positioned directly in the center slot. This high heat environment is essential for cooking the pork tenderloin quickly while creating a juicy, tender interior. Take a heavy oven-safe skillet, such as cast iron or stainless steel, and place it on your stovetop so it is ready for searing.
Organize all of your prep tools and ingredients within easy reach of your cooking station to make the cooking process smooth and stress-free. Measure out your liquid ingredients, peel your fresh garlic, and grate your ginger so that every component is ready when needed. Preparing your station in advance prevents key components from burning once heat is applied to the pan.
Inspect your cooking space to ensure proper ventilation, as searing meat at high temperatures will produce a small amount of sizzle and steam. Keep your oven mitts nearby, remembering that the handle of your skillet will become extremely hot during its time in the oven. Taking these simple preparation steps guarantees a organized, calm cooking experience from start to finish.
Step 2: Preparing and seasoning the pork tenderloin
Remove the pork tenderloins from their packaging and place them on a clean cutting board dedicated to raw protein. Take a sharp paring knife and carefully trim away any silver skin—the shiny white connective tissue—running along the surface of the meat. Leaving silver skin intact can cause the tenderloin to curl up and become tough as it cooks.
Pat the surface of both pork tenderloins completely dry using paper towels. Removing excess surface moisture is a crucial step because damp meat will steam rather than sear, preventing the development of a dark brown crust. Dry meat ensures immediate contact with hot oil, promoting superior browning and sealing in essential juices.
Season the tenderloins evenly on all sides with the half teaspoon of freshly cracked black pepper, pressing the spices gently into the meat so they stick. Allow the seasoned tenderloins to rest on your cutting board for about ten minutes at room temperature. Bringing meat slightly up in temperature before searing prevents pan chilling and guarantees uniform heat distribution throughout roasting.
Step 3: Whisking the honey garlic glaze
In a medium glass bowl or glass measuring cup, combine the one-third cup of sweet honey with the one-quarter cup of low-sodium soy sauce. Use a small wire whisk to blend the two liquids together until the honey completely dissolves into the savory soy base. The mixture should look dark, smooth, and flow easily off the back of a spoon.
Add the four minced garlic cloves, two tablespoons of brown sugar, one tablespoon of apple cider vinegar, and one teaspoon of freshly grated ginger into the bowl. Whisk vigorously for about thirty seconds until the brown sugar crystals dissolve and the aromatic garlic and ginger are evenly suspended throughout the glaze. Smelling this mixture reveals an irresistible combination of floral sweetness and sharp garlic warmth.
Set aside half of this whisked sauce in a separate small container to reserve for the final simmered pan reduction later. Keeping half of the sauce separate prevents raw meat cross-contamination and ensures you have pristine, clean glaze ready for serving. Stir the cornstarch slurry—one tablespoon of cornstarch mixed with two tablespoons of cold water—in a tiny dish and keep it handy near your stove.
Step 4: Searing the pork in the hot skillet
Place your oven-safe skillet over medium-high heat on the stovetop and add one tablespoon of olive oil. Swirl the pan to coat the bottom evenly, allowing the oil to heat until it shimmers and just begins to show faint wisps of smoke. A properly heated skillet prevents the meat from sticking and guarantees an instant, high-heat sear.
Using sturdy tongs, carefully lay both seasoned pork tenderloins into the shimmering oil, keeping a little distance between them in the pan. You should immediately hear a loud, satisfying sizzle as the raw protein touches the hot surface. Allow the meat to sear undisturbed for two to three minutes until a golden brown crust forms underneath.
Rotate the tenderloins every two minutes, searing all four sides until the entire exterior displays a rich caramel color. Sear the rounded ends briefly by standing the tenderloins upright with your tongs for a few seconds. This searing process locks in structural moisture while filling your kitchen with an incredibly appetizing savory aroma.
Step 5: Applying the sauce and roasting in the oven
Once all sides of the pork tenderloins are beautifully browned, reduce the stovetop heat to low for just a moment. Pour the unreserved portion of your prepared honey garlic sauce directly over the top of the tenderloins in the hot skillet. The sugars in the glaze will immediately bubble, foam, and coat the bottom of the pan with rich scents of garlic and warm honey.
Use a heat-resistant spoon or silicone brush to baste the top and sides of the tenderloins with the warm, bubbling sauce from the bottom of the skillet. Ensure both cuts of meat are generously coated in the aromatic liquid before moving the skillet off the stovetop burner. The combination of sear and sauce sets the stage for a rich layer of flavor as it bakes.
Carefully transfer the entire oven-safe skillet into your preheated 400°F oven using sturdy oven mitts. Roast uncovered for fifteen to twenty-two minutes, allowing the hot air to finish cooking the center while the honey glaze thickens into a dark, sticky shell around the pork. Monitor the oven closely toward the end of the cooking window to prevent the natural pan sugars from over-caramelizing.
Step 6: Monitoring internal temperature and resting
Begin checking the internal temperature of the pork tenderloins around the fifteen-minute mark using an accurate instant-read digital meat thermometer. Insert the thermometer probe horizontally into the thickest section of the tenderloin, ensuring the tip does not poke all the way through to the hot pan. The pork is cooked once the internal thermometer reads exactly 145°F.
Carefully remove the hot skillet from the oven and use clean tongs to transfer the roasted tenderloins to a clean cutting board or warm serving platter. Do not skip this critical resting period; let the meat rest uncovered for at least three to five minutes. Resting allows the muscle fibers to relax and reabsorb hot juices that would otherwise escape onto your cutting board if sliced immediately.
While the tenderloins are resting, observe how the delicate pink hue in the center stabilizes while the surface seals in rich moisture. The carryover heat during resting will raise the internal temperature by a few degrees, landing right at the ideal level for tenderness. This simple waiting period makes all the difference between tough meat and a tender, juicy meal.
Step 7: Thickening the sticky pan sauce glaze
While the cooked tenderloins rest on the cutting board, place the skillet with its warm pan juices back onto your stovetop over medium heat. Pour the reserved half of the un-contaminated honey garlic sauce into the pan, scraping up any delicious browned bits stuck to the bottom with a wooden spoon. These caramelized bits hold concentration of savory pork flavor.
Give your prepared cornstarch slurry a quick stir to re-suspend any settled starch, then pour it directly into the simmering sauce in the skillet. Whisk continuously as the mixture comes to a gentle boil, watching as the liquid transforms from a thin sauce into a glossy, thick glaze. The reduction will darken in color and coat the back of a spoon within two to three minutes of simmering.
Taste the finished glaze carefully using a spoon, noting the balance of garlic warmth, honey sweetness, and soy umami. If you prefer a thinner sauce, whisk in a tablespoon of warm water or chicken broth until you reach your desired consistency. Remove the skillet from the heat source as soon as the glaze reaches a smooth, pourable texture.
Step 8: Slicing and coating the pork tenderloin
Return to your rested pork tenderloins on the cutting board using a long, sharp chef’s knife or slicing knife. Slice the meat bias-style into half-inch thick rounds, cutting smoothly through the crust without tearing the soft tender interior. Notice how juicy the pink-tinged center remains, surrounded by a dark brown outer edge.
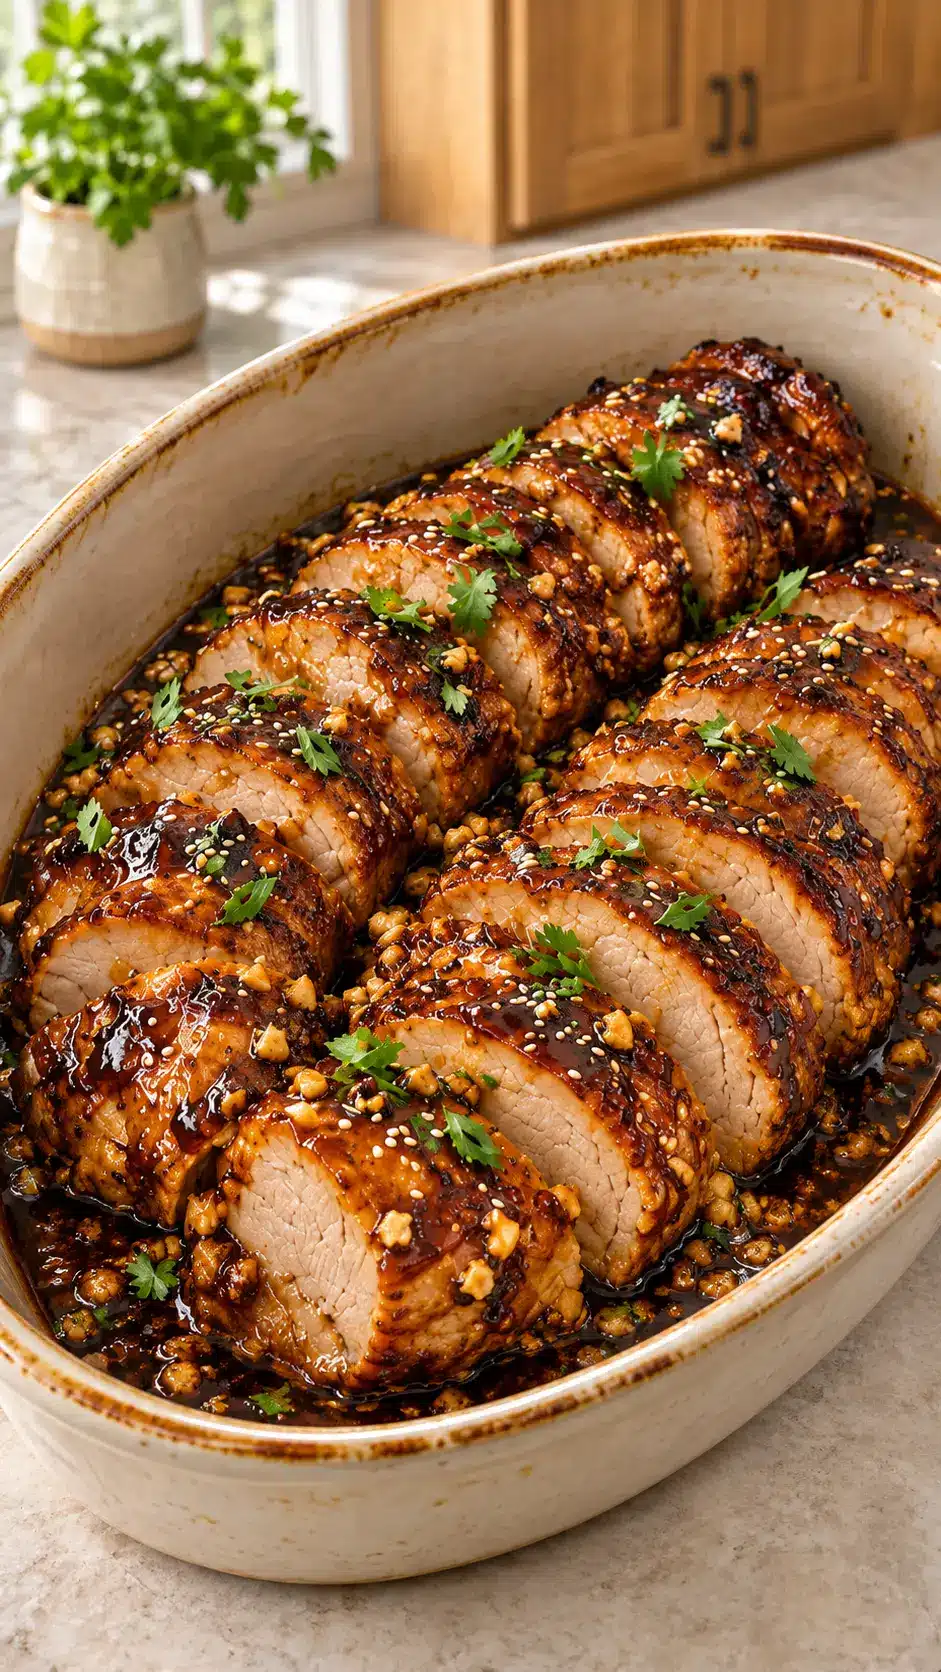
Arrange the sliced tenderloin rounds on a warm serving platter, overlapping them slightly to create an attractive display for your table. Spoon the hot, thickened honey garlic pan glaze generously over top of the sliced meat, allowing the sticky sauce to drip into every crevice. The glaze brings out the deep color of the pork, creating an appealing dish that is ready to serve.
Save any remaining glaze in a small sauce boat to serve at the table alongside your main dish. Guests will appreciate having extra sauce to drizzle over their meat or neighboring side dishes like rice or mashed potatoes. The rich sheen on the sliced meat serves as visual proof of a perfectly executed recipe.
Step 9: Garnishing and serving
Finish your culinary creation by sprinkling one tablespoon of toasted sesame seeds evenly across the glazed pork slices. The pale sesame seeds offer visual contrast against the dark glaze while contributing a subtle, nutty crunch to every bite. Sprinkle two tablespoons of finely chopped fresh cilantro or parsley over the top for a pop of color.
Serve the dish immediately while the meat is warm and the garnish remains vibrant and fresh. Pair the glazed tenderloin slices with your favorite warm sides, such as roasted vegetables or fluffy rice, to complete a balanced family dinner plate. The blend of sweet aromas and garlic will invite everyone to sit down and enjoy.
Take pride in presenting a meal that captures the standard of fine dining within the comfort of your home kitchen. From the crisp exterior sear to the sticky garlic reduction, every element reflects careful culinary practice. Enjoy the compliments from your family as they enjoy this satisfying, easy dinner solution!
What to do when the dish does not turn out as planned
If your finished glaze tastes overly salty, it is usually because the soy sauce reduced too rapidly or high-sodium soy sauce was used by mistake. To fix a heavy salt balance, immediately whisk in one to two tablespoons of plain warm water, chicken broth, or an extra tablespoon of raw honey. Adding a fresh splash of apple cider vinegar can also help neutralize excess sodium notes by shifting the flavor balance back toward bright acidity. Next time, double-check that your soy sauce bottle is explicitly labeled as low-sodium before whisking your glaze ingredients together.
When the pork tenderloin turns out dry or tough, overcooking is almost always the cause. Because pork tenderloin is extremely lean, leaving it in the oven even five minutes past the target temperature can drain its juices. To rescue dry meat, slice the tenderloin thinly and submerge the rounds directly into the warm pan glaze, allowing them to soak for five minutes before serving. The warm, thick sauce will coat the meat fibers, restoring moisture to every bite. Invest in a digital meat thermometer so you can pull the pork out of the oven the moment it hits 145°F.
If your glaze appears thin and watery rather than thick and sticky, it simply needs a bit more time or heat to reduce properly. Return the sauce to the stovetop over medium heat and simmer for an additional two to three minutes to evaporate excess water content. If it remains too thin, mix an additional half-teaspoon of cornstarch with one teaspoon of cold water and whisk it into the bubbling sauce. Watch as the cornstarch activates over heat, quickly turning the thin liquid into a glossy coating that clings to your spoon.
If the final dish tastes bland or flat, the flavor components were likely under-measured or the meat was not properly seasoned during step two. Quickly revive flat flavors by stirring a pinch of sea salt, a grate of fresh ginger, or a splash of fresh lemon juice directly into the warm glaze. Drizzling a tiny drop of toasted sesame oil over the plated tenderloin right before serving can also introduce deep, aromatic notes that elevate the whole meal. Always taste your finished pan glaze before pouring it over the sliced meat so you can make final adjustments with confidence.
Frequently asked questions about Easy Honey Garlic Pork Tenderloin
Can I use pork loin instead of pork tenderloin for this recipe?
While pork loin sounds similar, it is a much larger, wider, and tougher cut of meat that requires a different cooking time and method. Pork tenderloin is long, thin, and cooks very quickly, making it ideal for high-heat searing and fast roasting. If you must use pork loin, you will need to adjust the roasting time significantly upward and monitor internal temperatures carefully to avoid drying out the roast.
Is it safe to eat pork tenderloin if it is slightly pink in the center?
Yes, modern food safety guidelines established by the USDA confirm that pork is completely safe and optimal to eat when cooked to an internal temperature of 145°F followed by a three-minute rest. At this temperature, the meat will retain a light pink color in the very center, which ensures maximum juiciness and tender texture. Overcooking pork past 160°F to eliminate all pinkness usually results in dry, tough meat.
What type of skillet is best for making honey garlic pork tenderloin?
A heavy cast-iron skillet or a multi-ply stainless steel pan is the best choice for this recipe because both can handle high stovetop searing temperatures and transfer safely into a hot oven. Cast iron holds heat evenly, creating an exceptional brown crust on the meat while maintaining stable temperatures. If you do not own an oven-safe skillet, sear the pork in a standard skillet and transfer it to a rimmed baking sheet before pouring the glaze over top.
Can I prepare the honey garlic glaze in advance?
Yes, preparing the glaze in advance is a fantastic way to streamline weeknight dinner preparation. You can whisk the honey, low-sodium soy sauce, minced garlic, brown sugar, apple cider vinegar, and grated ginger together in a sealed glass jar and keep it in the refrigerator for up to five days. When you are ready to cook, give the jar a strong shake and proceed with searing your seasoned tenderloin as directed in the recipe instructions.
How do I prevent the honey garlic glaze from burning in the pan?
Honey contains natural sugars that can scorch quickly if exposed to direct high heat for too long. To prevent burning, only pour the glaze over the pork after you have finished searing the meat and turned down the stovetop burner. The liquid will heat safely once transferred into the oven alongside the pork, and keeping half the sauce reserved for a gentle stovetop reduction at the end guarantees a smooth, un-scorched finish.
Can I make this recipe in an air fryer instead of an oven?
Yes, this recipe works very well in an air fryer if your basket is large enough to hold the tenderloins comfortably. Preheat your air fryer to 400°F, sear the seasoned tenderloin lightly in a pan or place it directly into the greased basket, brush generously with sauce, and cook for 12 to 15 minutes. Check the internal temperature frequently using a digital thermometer to ensure you pull the meat out right when it hits 145°F.
Sticky Honey Garlic Pork Tenderloin
Tender slices of pork coated in a glossy sweet-and-savory honey garlic glaze, finished with sesame seeds and fresh herbs. A restaurant-style dinner that's surprisingly simple to make at home.
- 2 pork tenderloins (about 2 lbs total)
- 4 garlic cloves, minced
- 2 tbsp brown sugar
- 1 tbsp apple cider vinegar
- 1 tbsp olive oil
- 1 tsp fresh grated ginger
- 1 tbsp cornstarch mixed with 2 tbsp water
- 1 tbsp sesame seeds
- fresh cilantro or parsley
- 1Preheat oven to 400°F.
- 2Pat pork dry and season with pepper.
- 3Heat olive oil in an oven-safe skillet and sear pork for 2–3 minutes per side.
- 4Whisk together honey, soy sauce, garlic, brown sugar, vinegar, and ginger.
- 5Pour half the sauce over the pork and transfer the skillet to the oven.
- 6Roast for 15–22 minutes, until the center reaches 145°F.
- 7Remove pork and let rest for at least 3 minutes.
- 8Simmer the remaining sauce with cornstarch mixture until thickened.
- 9Slice pork, pour glaze over the slices, and garnish with sesame seeds and fresh herbs.
in the juices.
Keywords: pork tenderloin, honey garlic pork, glazed pork, easy dinner recipe