Classic Beef Stew with Potatoes, Carrots and Peas
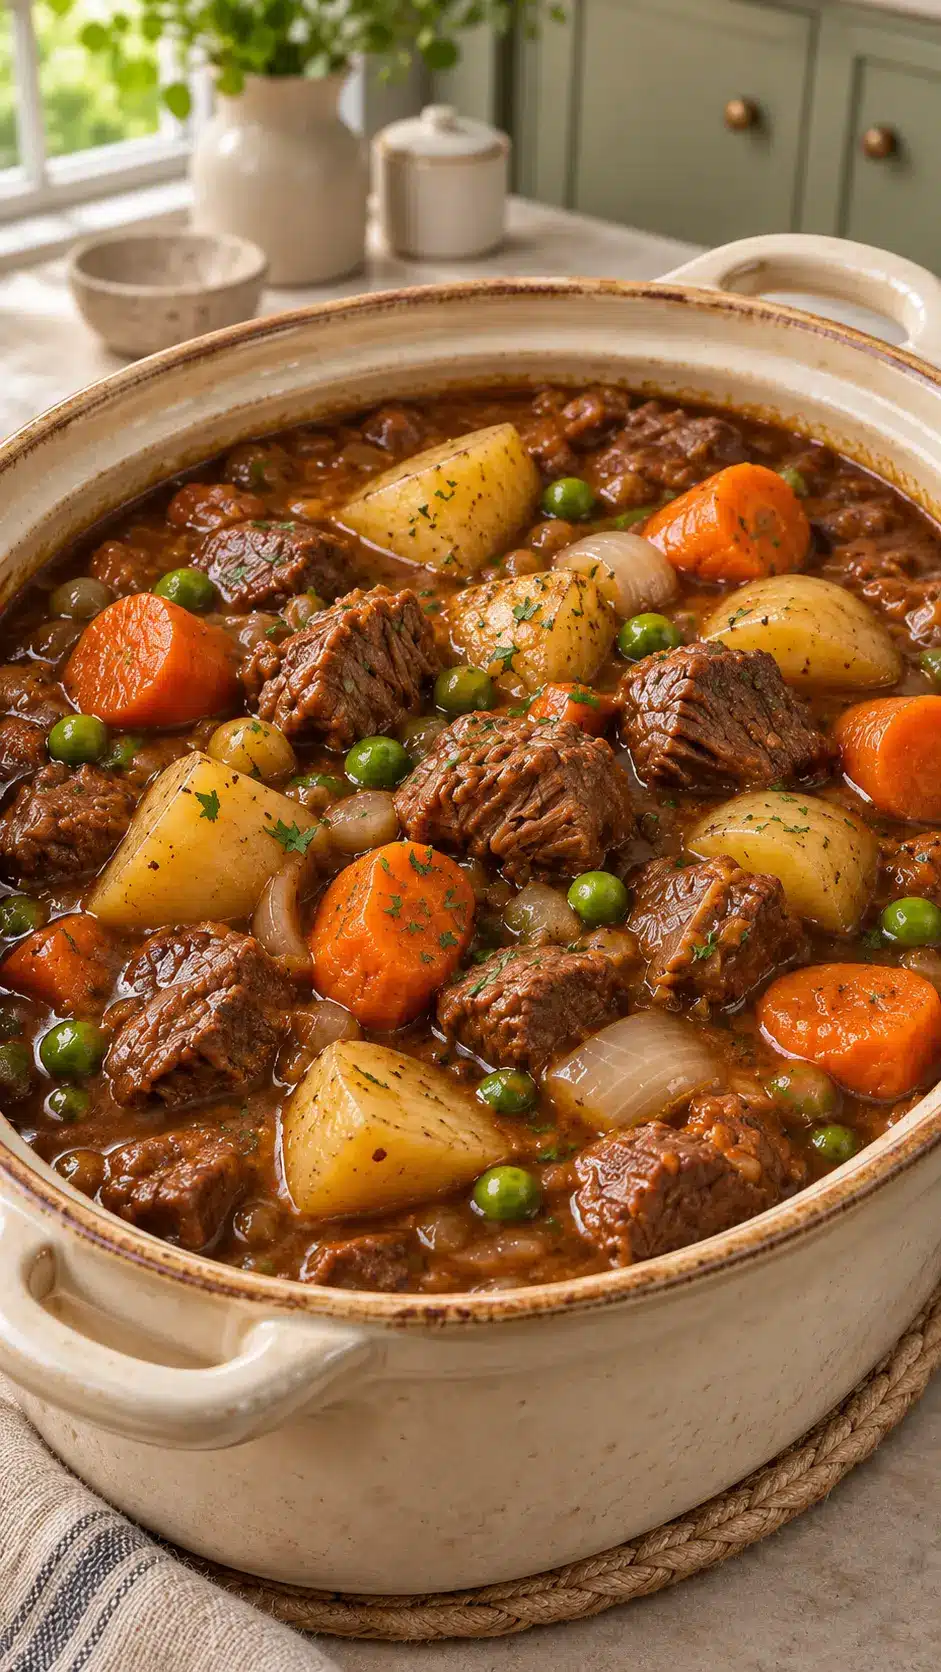
There is an undeniable magic that happens when the chill of autumn or winter settles over the neighborhood and a heavy pot begins to simmer on the stove. On busy weeknights, finding a meal that satisfies everyone at the table while bringing a sense of warmth and togetherness can feel like a daunting task. Fortunately, making a heartwarming batch of Classic Beef Stew With Potatoes offers the ultimate culinary solution for any bustling household.
This comforting recipe transforms simple pantry staples and humble cuts of meat into a masterpiece of rich flavors and meltingly tender textures. It stands as a reliable, crowd-pleasing option that fills your entire home with an irresistible, savory aroma that welcomes family members the moment they walk through the door.
Whether you are planning a relaxed weekend supper or seeking an effortless way to feed a hungry crowd after a long day of work and school, this timeless dish delivers pure comfort in every single bowl. Gather your cooking utensils, tie your apron, and get ready to master a foolproof technique that will quickly become a permanent fixture in your weekly dinner rotation.
Discover more delicious recipes and everyday cooking tips at MindaPos!
The history and tradition behind Classic Beef Stew With Potatoes
The origins of simmering meats and root vegetables together in a communal pot stretch back centuries, rooted in the practical necessity of rural life. European immigrants brought their cherished hearth cooking techniques across the Atlantic, adapting traditional European peasant potjes and stews to fit the abundant bounty of the American frontier. Over generations, these recipes evolved from simple survival fare into celebrated symbols of domestic tranquility and culinary heritage.
In American culinary history, the slow-cooked pot roast and its broth-rich counterpart became staples of Sunday dinners and holiday gatherings alike. Homemakers relied on affordable, tougher cuts of beef such as the chuck roast, knowing that patient heat and moisture would break down tough connective tissue into velvety gelatin. This patient transformation taught generations of home cooks that time spent tending a simmering pot yields unmatched culinary rewards.
The addition of native New World ingredients like potatoes alongside traditional carrots and onions completed the modern profile of this beloved comfort food. As families moved from agrarian lifestyles to bustling suburban communities, the heavy cast-iron Dutch oven remained a cherished anchor in the kitchen. It represented an edible archive of family history, where recipes were handed down by word of mouth, stained index cards, and cherished family cookbooks.
Today, preparing Classic Beef Stew With Potatoes serves as a delicious bridge between past traditions and fast-paced modern lifestyles. Even as our kitchens embrace modern appliances and high-tech gadgets, the classic stovetop method remains deeply therapeutic. It invites us to slow down, practice mindful cooking techniques, and appreciate the simple joy of sharing a deeply nourishing meal with the people we love most.
Why you will love Classic Beef Stew With Potatoes
- Unmatched flavor harmony: The combination of savory beef broth, aromatic herbs, earthy potatoes, and sweet vegetables creates a beautifully balanced taste profile.
- Fork-tender texture: Long, gentle simmering breaks down the beef chuck roast until it practically melts on your tongue.
- Wholesome nutrition: Packed with protein, fiber, and essential vitamins from fresh vegetables, making it a genuinely healthy alternative for growing families.
- Exceptional versatility: Easily customizable to include whatever seasonal root vegetables or fresh herbs you have available in your refrigerator.
- One-pot convenience: Cooking everything together in a single Dutch oven minimizes cleanup and lets you spend more time enjoying your evening.
- Budget-friendly appeal: Utilizes economical cuts of meat that yield gourmet results when cooked with care and patience.
- Ideal for meal planning: Tastes even better the next day as the flavors continue to meld and deepen while resting in the refrigerator.
The kitchen secrets behind perfect flavor and texture
Achieving restaurant-quality depth in a homestyle pot of Classic Beef Stew With Potatoes comes down to understanding a few fundamental culinary sciences. The first critical step is searing the cubed beef chuck roast over medium-high heat with a little olive oil. This Maillard reaction—the chemical reaction between amino acids and reducing sugars—creates a deeply browned crust that forms the flavor foundation for your entire sauce.
Coating the beef cubes in all-purpose flour before searing serves a dual purpose in the cooking process. As the meat browns, the flour browns alongside it, and later acts as a natural thickening agent when the beef broth and tomato paste are introduced. This technique eliminates the need for artificial starches and ensures a velvety, clinging gravy that coats every single potato and carrot piece.
Temperature control is the next vital element for success, requiring a gentle simmer rather than a vigorous boil. A harsh, rolling boil will cause the muscle fibers in the beef to seize up, resulting in dry and stringy meat regardless of how long it cooks. Maintaining a low, steady bubble allows collagen within the chuck roast to slowly melt into gelatin, infusing the liquid with body and richness.
Finally, staggering the addition of your ingredients guarantees that nothing overcooks or turns to mush during the long braising process. Hearty root vegetables like potatoes and carrots go in during the final stages so they retain their structural integrity while absorbing all those wonderful savory flavors. Stirring in tender green peas at the very end preserves their vibrant emerald color and fresh, sweet pop against the rich background.
How to choose the best ingredients for gourmet results
Creating a truly memorable family dinner starts long before you turn on the stove by selecting the finest ingredients available. When visiting your local supermarket, neighborhood grocery store, or farmers market, look for a well-marbled beef chuck roast. Abundant flecks of white fat running through the red meat are the ultimate indicator of tenderness and flavor.
For the vegetables, seek out firm, unblemished Yukon Gold potatoes, which offer a naturally buttery flavor and hold their shape beautifully during extended braising. Choose bright orange carrots that feel heavy for their size and snap crisply when bent, ensuring maximum natural sweetness. Selecting fresh ingredients from local produce vendors whenever possible elevates the entire dish and supports regional agriculture.
Aromatics like yellow onions and garlic bulbs should be tight-skinned, heavy, and free of any soft spots or sprouting shoots. Fresh herbs such as thyme and rosemary add an authentic herbal aroma that dried varieties simply cannot replicate, though dried herbs work wonderfully in a pinch. Utilizing sustainably sourced ingredients and gourmet quality pantry staples ensures that every spoonful delivers pure, unadulterated comfort.
Do not overlook the importance of high-quality beef broth or stock as the primary liquid base for your braise. A robust, deeply flavored stock provides the savory backbone that ties the meat, tubers, and seasonings together into a cohesive masterpiece. Taking the time to curate these components guarantees a finished dish that exceeds all expectations.
Ingredient variations and dietary adaptations
Adapting this traditional recipe to suit various dietary needs or unexpected pantry shortages is remarkably straightforward for home cooks. To create a plant-based fasting or vegan version, simply omit the beef and swap the meat broth for a rich mushroom or vegetable stock. Substitute hearty button or cremini mushrooms, cubed firm tofu, or cooked lentils to mimic the satisfying heft of the original dish.
For those avoiding gluten, achieving the necessary gravy thickness requires a simple swap of the traditional wheat flour for cornstarch or a certified gluten-free flour blend. Whisk your chosen gluten-free thickener with a splash of cold water before stirring it into the simmering pot to prevent lumps from forming. The resulting sauce remains just as glossy and clinging as the original preparation.
Followers of low-carb or keto nutritional plans can easily modify the vegetable profile by replacing starchy potatoes with peeled turnips, radishes, or cauliflower florets. Radishes, in particular, lose their sharp bite when simmered in a savory broth and take on a texture strikingly similar to tender boiled potatoes. Ensure your thickener is omitted or replaced with a keto-friendly alternative like xanthan gum in tiny quantities.
Dairy-free households will find this recipe naturally compliant since it relies on olive oil rather than butter for browning the meat and aromatics. If a specific seasoning ingredient like fresh rosemary is missing from your pantry, dried Italian seasoning, crushed oregano, or marjoram can easily step in to provide that savory herbal note. Flexibility in the kitchen ensures you can always whip up a wonderful meal regardless of dietary restrictions.
The best sides and drinks to serve with this dish
- Crusty French baguette: Perfect for tearing apart and dipping straight into the rich, savory gravy at the bottom of your bowl.
- Crisp seasonal green salad: Tossed with a bright vinaigrette to cut through the rich, comforting weight of the braised beef and potatoes.
- Traditional creamy mashed potatoes: For those who can never have too much potato goodness alongside their hearty stew.
- Tangy pickled vegetables: Providing a sharp, acidic contrast that refreshes the palate between spoonfuls of savory meat and root vegetables.
- Chilled Pinot Noir or a dry Chardonnay: Offering fruity or buttery notes that complement the earthy aromatics of the thyme and rosemary.
- Refreshing iced tea or herbal infusions: Serving as non-alcoholic beverage options that cleanse the palate and enhance the cozy dining experience.
Refrigerating, freezing, and reheating correctly
- Refrigerator storage: Allow the stew to cool completely before transferring it to airtight glass or plastic containers, where it will safely keep for up to four days.
- Freezer preparation: Portion the cooled stew into heavy-duty freezer bags or containers, leaving a little headspace for expansion, and freeze for up to three months.
- Optimal shelf life: While safe to eat for months when properly frozen, enjoy the dish within two months for the absolute best flavor and vegetable texture.
- Reheating technique: Thaw overnight in the refrigerator, then warm slowly on the stovetop over medium-low heat, adding a splash of beef broth or water to restore the original sauce consistency.
Nutrition information and preparation times
- Calories
- Protein
- Fat
- Carbohydrates
| Parameter | Value |
|---|---|
| Prep time | 25 min |
| Cook time | 2 hours 5 min |
| Total time | 2 hours 30 min |
| Difficulty | Medium |
| Servings | 6–8 servings |
Ingredients
For the main mixture
- 2 lbs beef chuck roast, cubed
- 1½ lbs Yukon Gold potatoes, quartered
- 4 carrots, cut into thick pieces
- 1 cup frozen peas, at room temperature
- 1 large onion, diced
- 3 garlic cloves, minced
- 3 tbsp all-purpose flour
- 3 tbsp olive oil
- 4 cups beef broth
- 2 tbsp tomato paste
- 1 tbsp Worcestershire sauce
- 1 tsp dried thyme
- 1 tsp dried rosemary
- 2 bay leaves
- salt and pepper, to taste
A step-by-step guide to a successful recipe
Step 1: Preparing and seasoning the beef
Begin your cooking process by gathering all your ingredients and ensuring your beef chuck roast is trimmed of any excessive hard fat while retaining enough marbling for rich flavor. Cut the meat into uniform bite-sized cubes, roughly one and a half inches across, so they cook evenly throughout the braising process. Season the cubed meat generously with kosher salt and freshly cracked black pepper, making sure every piece is properly seasoned before the next action.
Next, sprinkle the all-purpose flour directly over the seasoned beef cubes in a large mixing bowl. Toss the meat thoroughly with your hands or a large spoon until every cube is coated in a light, even dusting of flour. This crucial layer will absorb excess surface moisture and help create a magnificent, savory crust when the meat hits the hot pan.
One common pitfall at this stage is adding too much flour, which can result in a pasty sauce rather than a glossy, clinging gravy. Shake off any loose flour excess from the meat before moving it toward the stove. Your prepared beef is now primed and ready for browning.
Step 2: Searing the meat for maximum flavor
Place a heavy-bottomed Dutch oven over medium-high heat and add the olive oil, allowing it to shimmer and coat the bottom of the pot evenly. Once the oil is hot and fragrant, begin adding the floured beef cubes in deliberate batches. Avoid overcrowding the pot, as packing too much meat in at once will cause it to steam rather than sear.
Listen closely for a steady, vigorous sizzle as the beef contacts the hot metal, which indicates that proper caramelization is taking place. Allow the meat to sit undisturbed for two to three minutes on each side to develop a gorgeous, golden-brown crust. Use tongs to turn the cubes until all sides are deeply browned and caramelized.
Transfer the seared beef chunks to a clean plate using your tongs, leaving all those wonderful brown fond bits clinging to the bottom of the Dutch oven. These caramelized bits are pure gold and will dissolve into the braising liquid later, imparting incredible depth to your finished sauce. Repeat the process until all the beef is perfectly browned.
Step 3: Building the aromatic base
Reduce the heat under your Dutch oven to medium and toss the diced yellow onion directly into the remaining cooking oils and pan drippings. Stir the onions frequently with a wooden spoon, scraping up any browned bits stuck to the bottom of the pot. Cook the onions for four to five minutes until they turn translucent and develop a sweet, appealing aroma.
Add the minced garlic cloves and the tomato paste directly to the softened onions in the center of the pot. Stir continuously for about one minute, watching closely so the garlic does not burn or turn bitter. The tomato paste will darken slightly in color, adding a rich umami undertone to your aromatic base.
This foundational step builds layers of complex flavor that elevate the dish far beyond a simple boiled dinner. The sweet onions and fragrant garlic harmonize with the residual beef drippings, creating an intoxicating kitchen aroma. Your pot is now ready for the liquid elements.
Step 4: Combining ingredients and creating the broth
Return all the seared beef cubes and any accumulated juices resting on the holding plate back into the Dutch oven with the aromatic onion mixture. Pour in the four cups of beef broth, making sure to scrape the bottom of the pot one more time to release any lingering flavor deposits. The liquid should bubble slightly around the edges as it begins to heat up.
Stir in the tablespoon of Worcestershire sauce, which introduces a wonderful savory tang that enhances the beefy characteristics of the dish. Sprinkle in the dried thyme and dried rosemary, crushing the herbs slightly between your fingers as you drop them in to release their essential oils. Nestle the two bay leaves right into the center of the liquid mixture.
Bring the entire contents of the pot to a gentle, rolling boil over medium-high heat, stirring occasionally to ensure the flour thickens the broth evenly. Once bubbles break the surface uniformly across the pot, you are ready to transition to the slow simmering phase. Keep a close eye on the pot during this transition to prevent any scorching at the bottom.
Step 5: Simmering the beef to tenderness
Cover the Dutch oven tightly with its heavy matching lid to trap all the rising moisture and heat inside the vessel. Immediately reduce the heat to low, establishing a gentle, barely perceptible simmer where bubbles only occasionally break the surface. Allow the beef to braise undisturbed in this cozy environment for seventy-five to ninety minutes.
During this extended cooking time, the tough collagen within the chuck roast slowly breaks down and melts into gelatin. Check the pot once or twice during the braising window to stir the contents and ensure the liquid level remains adequate. If the sauce seems to be reducing too quickly, add a small splash of warm water or additional broth.
Resist the temptation to rush this process by turning up the heat, as high temperatures will toughen the meat fibers. When the time is right, a test poke with a fork will reveal meat that yields effortlessly. Your beef is well on its way to becoming melt-in-your-mouth tender.
Step 6: Adding potatoes and carrots
Remove the lid from the Dutch oven carefully, keeping your face away from the rising steam, and take a moment to admire the developing sauce. Add your quartered Yukon Gold potatoes and thick-cut carrot pieces directly into the simmering broth, stirring gently to submerge them. These root vegetables will absorb the seasoned liquid and release their own natural starches to further enrich the gravy.
Replace the heavy lid securely and maintain that low, gentle simmer for an additional thirty to forty minutes. This window allows the tubers and carrots to cook through completely without turning into mush. The aroma filling your kitchen at this stage will be exceptionally comforting and rich.
Test the tenderness of a potato chunk and a carrot piece by piercing them gently with the tip of a sharp knife. They should offer zero resistance to the center while holding their distinct shapes in the pot. If they still feel slightly firm, give them another five to ten minutes of cooking time.
Step 7: Stirring in the green peas
Remove the lid once more and prepare to add the final colorful touch to your culinary creation. Scatter the cup of frozen peas evenly across the surface of the simmering stew, stirring them gently into the hot gravy. Because these peas are already tender, they require very little cooking time to reach perfection.
Allow the stew to cook uncovered or semi-covered for the final five minutes of the cooking process. This brief window heats the peas through while preserving their vibrant emerald green color and sweet pop. Overcooking the peas at this stage would cause them to lose their bright hue and fresh flavor.
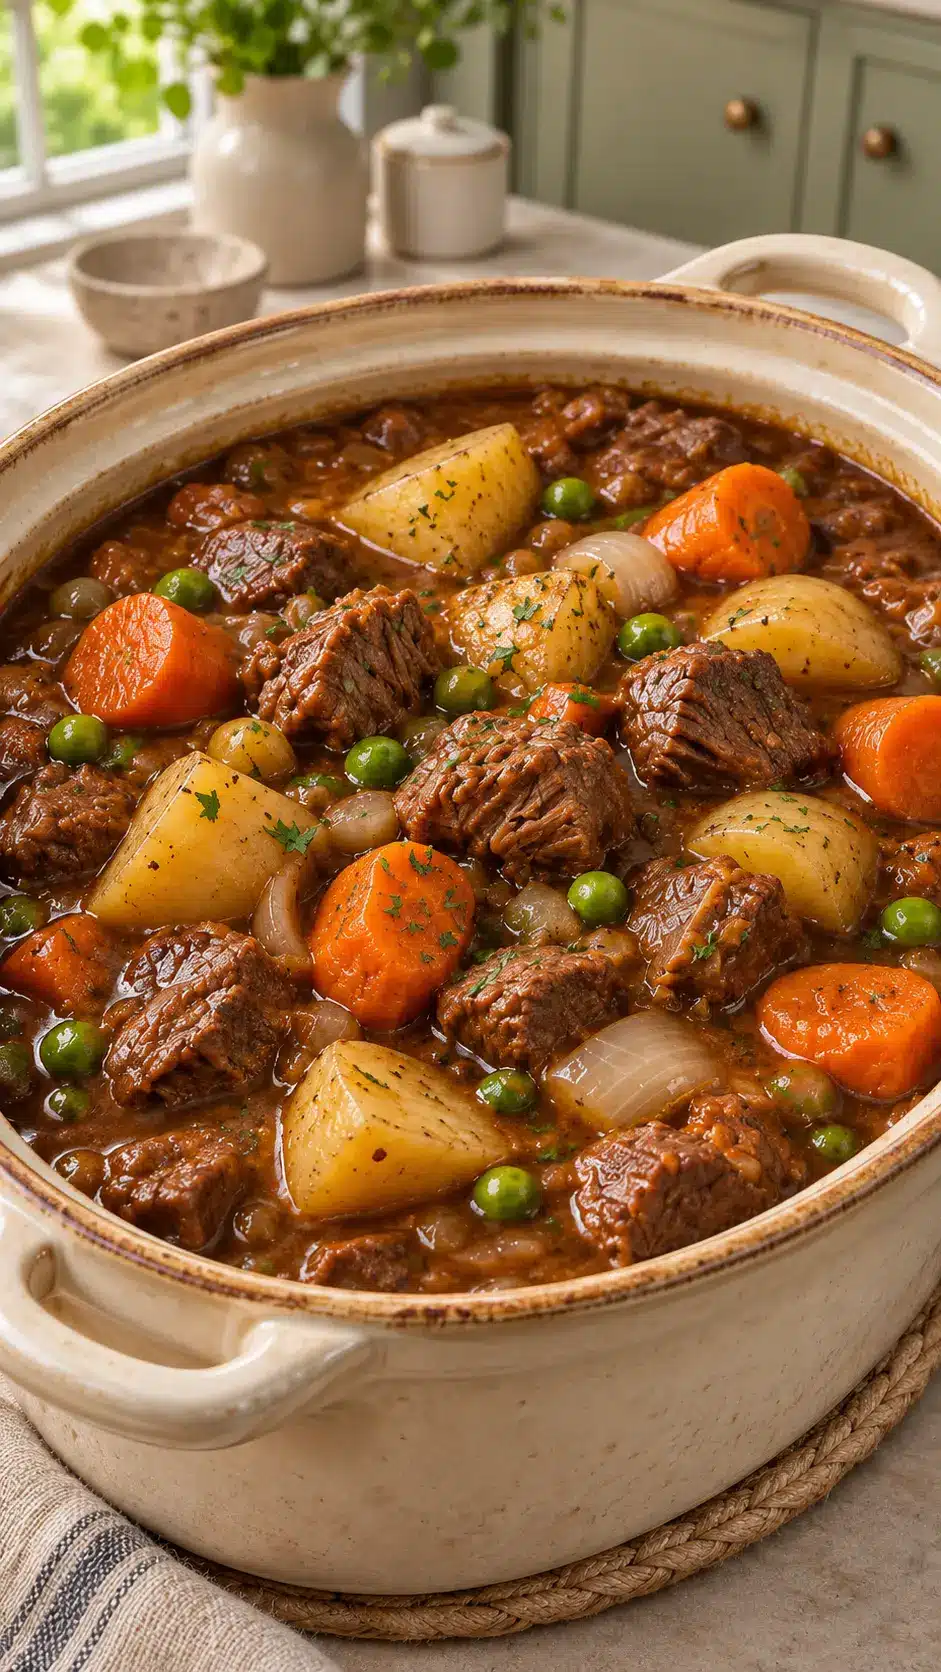
Observe how the sauce has thickened into a luxurious, glossy gravy that coats the back of your stirring spoon. The visual appeal of the tender beef, golden potatoes, orange carrots, and bright green peas is truly remarkable. You are now just moments away from serving time.
Step 8: Final seasoning adjustments and resting
Turn off the heat beneath the Dutch oven and carefully fish out the two bay leaves using a spoon or tongs, discarding them properly. Taste a small spoonful of the broth and gravy, adding extra salt and black pepper if necessary to suit your personal palate preferences. Every batch benefits from this final flavor check.
Place the lid back on the pot and let the stew rest undisturbed away from the heat source for five full minutes. This brief resting period allows the internal temperatures to stabilize and the meat fibers to relax, locking in all the delicious juices. Skipping this step can cause the piping-hot liquid to thin out prematurely on the plate.
Ladle the piping-hot stew generously into deep bowls, ensuring every serving gets a balanced share of beef, potatoes, carrots, and peas. Garnish with a sprinkle of freshly chopped parsley if desired, and serve immediately alongside your favorite crusty bread. Enjoy the fruits of your patient cooking labor!
What to do when the dish does not turn out as planned
If you taste your finished stew and realize it is uncomfortably salty, do not panic, as several kitchen fixes can rescue your meal. Stirring in a splash of heavy cream, unsweetened coconut milk, or a tablespoon of apple cider vinegar can help mask and balance excessive sodium. Alternatively, dropping in a peeled, raw potato cut into large chunks and simmering it for fifteen minutes will absorb much of the excess salt before you fish it out.
Should your stew turn out too dry because too much liquid evaporated during the braising process, the solution is straightforward. Simply whisk in a cup of warm beef broth, water, or tomato juice over low heat until your desired gravy consistency is restored. Simmer the pot gently for a few minutes to ensure the added liquid integrates completely with the existing flavors.
When the sauce or mixture looks unappealingly watery and thin, you can easily correct it by making a quick culinary slurry. Whisk one tablespoon of cornstarch with two tablespoons of cold water in a small cup until completely smooth, then stir it into the simmering stew. Allow the pot to bubble gently for two to three minutes until the starch activates and thickens the liquid into a glossy gravy.
If the dish tastes flat, dull, or generally bland upon final inspection, it usually indicates a need for a careful seasoning boost. Stir in a splash of Worcestershire sauce, a pinch of garlic powder, or a dash of kosher salt to awaken the dormant flavors. Finishing the bowl with a squeeze of fresh lemon juice or a pinch of fresh herbs can also brighten the profile dramatically.
Frequently asked questions about Classic Beef Stew With Potatoes
Can I make this recipe in a slow cooker instead of a Dutch oven?
Yes, you can easily adapt this recipe for a slow cooker by searing the floured beef and sautéing the aromatics on the stovetop first. Transfer everything except the frozen peas into your slow cooker and cook on low for six to eight hours until the beef is fork-tender. Stir in the peas during the final twenty minutes of cooking before serving.
What is the best cut of beef to use for this stew?
Beef chuck roast is universally recognized as the absolute best cut for traditional stews due to its high fat marbling and abundant connective tissue. As it braises slowly in liquid, this collagen melts completely, turning tough meat into exceptionally tender and succulent bites. Avoid lean cuts like sirloin or tenderloin, as they dry out and become tough during long cooking times.
Why do my potatoes turn to mush when I make stew?
Potatoes turn to mush when they are added to the pot too early and subjected to the entire duration of the cooking process. To prevent this, always add starchy tubers like Yukon Golds during the final thirty to forty minutes of simmering so they hold their shape. Choosing waxy or semi-waxy potato varieties also prevents them from breaking down into the broth.
Can I freeze leftovers of this dish successfully?
This dish freezes remarkably well for up to three months when stored in airtight, freezer-safe containers or heavy-duty storage bags. Keep in mind that potatoes can sometimes take on a slightly spongy texture after being frozen and thawed, though the overall flavor remains delicious. Thaw the frozen stew overnight in the refrigerator before reheating it slowly on the stovetop.
Do I really need to coat the beef in flour before searing?
Coating the beef cubes in all-purpose flour is a highly recommended step because it assists significantly with browning and thickening the sauce. The flour reacts with the heat to create a rich crust on the meat and acts as a natural thickening agent for the gravy. If you are avoiding gluten, you can substitute cornstarch or a gluten-free flour blend with great success.
How can I prevent the vegetables from burning at the bottom of the pot?
Preventing vegetables from scorching requires maintaining a low, gentle simmer and stirring the pot occasionally during the cooking process. Using a heavy-bottomed Dutch oven distributes heat much more evenly than thin metal pots, reducing the likelihood of hot spots. Always ensure there is enough liquid covering your ingredients as they cook.
Classic Beef Stew with Potatoes, Carrots and Peas
A timeless American comfort food made with fork-tender beef, hearty potatoes, sweet carrots, and peas in a thick, savory gravy.
- 2 lbs beef chuck roast, cubed
- 1½ lbs Yukon Gold potatoes, quartered
- 4 carrots, cut into thick pieces
- 1 cup frozen peas
- 1 large onion, diced
- 3 garlic cloves, minced
- 3 tbsp all-purpose flour
- 3 tbsp olive oil
- 4 cups beef broth
- 2 tbsp tomato paste
- 1 tbsp Worcestershire sauce
- 1 tsp dried thyme
- 1 tsp dried rosemary
- 2 bay leaves
- salt and pepper to taste
- 1Season beef with salt and pepper and toss with flour.
- 2Heat olive oil in a Dutch oven and brown the beef in batches.
- 3Add onion and cook until softened, then stir in garlic and tomato paste.
- 4Return beef to the pot and add broth, Worcestershire sauce, thyme, rosemary, and bay leaves.
- 5Cover and simmer gently for 75–90 minutes.
- 6Add potatoes and carrots and continue cooking for 30–40 minutes until the beef and vegetables are tender.
- 7Stir in peas during the final 5 minutes.
- 8Remove bay leaves and adjust seasoning.
- 9Let the stew rest for 5 minutes before serving.
Keywords: beef stew, comfort food, beef chuck roast, potato and carrot stew, classic dinner